


Whether you’re on that Christmas gift making/buying kick or just wanting to splurge (in the healthiest, most frugal way possible!) on yourself, YOU HAVE TO MAKE THIS!
I’ve been putting it off because I wayy overestimated how challenging it would be to make, and quite honestly I’ve been feeling just plain too lazy to clean up the mess that working with beeswax makes (though I did my best to avoid that this time, details below). But I promise you, this is EASY, with few ingredients required, and the final product actually WORKS! Here’s a sneak peek of what we’ll be working with:

Winter here in the Northeast can wreak havoc on the skin. It hasn’t happened for me yet, but there’s usually a point in the season where my hands get so dry and sore that they don’t fully recover until the warmth of spring arrives. A number of people I know get the worst cracks in their heels and other areas of their feet, and this salve, I’m certain, will be great for both.
(How do I know? Wait ’til you feel the consistency of this stuff. Go ahead, whip it up and then try to wash it off your hands. It’s even difficult to remove with soap! I’m convinced this will hold even the teensiest bit of moisture on the skin!)
The recipe as written below will fill about three 4 oz. jars, as shown below. I didn’t firmly press the salve all the way down into the bottom of the jars, so there is certainly air space, but my guess is that the totally yield is about 8 or 9 oz. You can choose to fill up a larger jar; I wanted to have a few little “sampler” gifts to give, so I went for the smaller containers. You’ll want to use glass, especially if you choose to include essential oil(s), which will eat away at plastic, in your recipe. (Yeah, yeah we’re diluting them.. but still. JUST GET RID OF (aka recycle) YOUR PLASTIC ALREADY!!!)

So, will you come along on this DIY beauty product adventure with me? I know you might be thinking it’s easier/cheaper to just use a commercial product like Burt’s Bees hand salve (which, I will admit, has worked really well for me in the past), but do the math and you’ll find that it’s really not. Plus, what beats the convenience and satisfaction of being able to make it yourself?
Just get your hands on these ingredients already, and let’s go.
What we’ll need is:
1/4 c Shea butter
1/4 c coconut oil
3 T beeswax
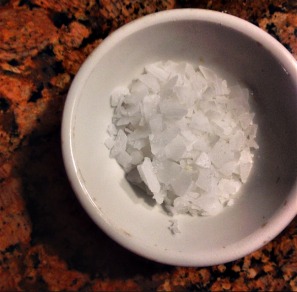
1/4 c Magnesium flakes (which will be mixed with 2 T boiling water to make Mg oil. If you’d rather just buy the oil straight away, that works, too!)
2 T vitamin E oil (optional)
10 drops peppermint essential oil (optional; can also be swapped for another essential oil or EO combo)
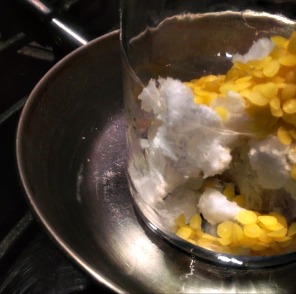
Begin with the Shea butter, coconut oil, and beeswax. These should be heated in a double boiler system over medium heat. Not much water is needed – if there is an inch or so in the bottom of your pot or pan, that will be plenty. (As you can see, I used a recycled glass bottle to melt my materials in .. I wouldn’t recommend using anything that you’re not sure to be heat safe, but again I was feeling lazy this time around…) These ingredients will probably take 10 to 15 minutes or so to blend together; you can stir occasionally during this time to speed things up, if you like.

 —–>
—–> 
In the meantime, make your Magnesium oil. This is so simple! Put the flakes in a small bowl that won’t crack when exposed to heat, boil 2 T of water, and then add the boiling water to the flakes. They will begin to dissolve immediately; stir to help it along. Let the newly made Mg oil cool slightly as the materials in your double boiler are meltinggg awayyyy.
 —–>
—–> 
Once the oil/butter/beeswax have melted completely, give your mixture a stir and take it off the heat. (Be careful! Use an oven mitt if necessary.) The next step will be to beat it with a handheld mixer, so this would be a good time to find a container that you can mix it in. Since you can certainly adjust this recipe to make more or less salve, the size of your container may vary, but don’t forget to find one that has sides high enough to prevent splattering. (You can see I did *not* do that here .. But I promise, it was only to make for a better picture 😉 ) While the freshly-melted mixture is still hot and liquidy, pour it into the container in which you’ll be mixing. (And I’ll remind you again since I can never say it enough – no plastic please!! Especially since we’re working with essential oils.)
Once in the mixing bowl, let the mixture sit until it has begun to cool; a visual indication that this is happening is the mixture becoming more and more opaque. You don’t want it to be cooled (and thus hardened) all the way, but you do want to be working with a mixture that has started to become solid. It sounds precise, but it’s really not 😉 Try your best and I know it will work for you!
This is how it looked when I was just about ready to begin beating:

Mix a bit with the handheld beaters, until you’ve whipped the whole batch into a fluffier consistency. Then, begin to slowly add the oils – a few drops or a small pour at a time (while continuing to beat):
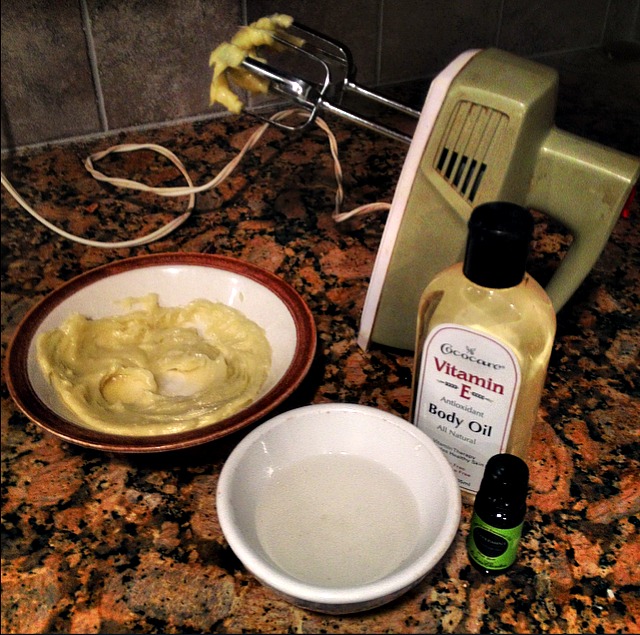
I added the Mg oil first, though I don’t think order would make too much of a difference here. Once the Mg oil was totally mixed in, I added the Vitamin E oil, then finally the essential oil (peppermint in my case, though I’ve already even whipped up a second batch with vanilla and lavender essential oils; use what you like/have on hand! And if you’re looking to make this salve even more medicinal, choose EOs that have healing properties when used on the skin.), again a few drops at a time. Once that is completely integrated, it’s time for a break! Woohoo!! Place the mixture in the refrigerator for 15 minutes or so, and go relax.
Finally, take the cooled mixture out of the fridge, beat it with the handheld mixers one final time, and voila! The texture at this point should be something resembling a thick body butter …


(told you the bowl I chose was messy…)
… and it’s ready to use! I distributed mine into those three pretty little glass jars; do with yours what you like. For fancy (and thoughtful! and professional! and personalized!) gift presentation, make labels! (A simple glue stick is enough to adhere a printed label onto glass.) Good luck with the cleanup (if you weren’t as lazy as I was here and actually melted your ingredients in a nice Pyrex container that you’d like to reuse for something other than cosmetic-making crafts, rubbing alcohol swabs are quite effective in getting that last bit of sticky and impossible beeswax off…), and enjoy!

Happy creating, Happy giving .. MERRY CHRISTMAS!!
And just one final note on essential oils – Use caution! Certain oils should not be used on/near pets, children, or pregnant women. And while some sources claim that specific oils can be used neat (i.e. undiluted) on the skin, this is generally not regarded as safe. If you choose to use EOs this way, it should be under the supervision of a certified aromatherapist or other professional. Do your research! Be smart, and you’ll be fine 🙂

Leave a comment